Showing posts with label butter. Show all posts

Monday, February 8, 2016

PEACH COBBLER


Hot, bubbling cobbler!

What can go wrong with a cobbler if you follow the recipe exactly? And you know how I always follow a recipe exactly - not! But I really tried this time. (And the results were amazing!)
Delicious home canned peaches! (But you can use store bought peaches if you don't have these.)

This summer, Dayna and I put up fresh peaches that we purchased from Angie Viebrock and The Farm Wife's Table. Let me tell you, they were worth canning and savoring, even though I wanted to eat the whole bushel at once. These peaches had such great flavor! 

Side story: Angie brought these to my house (special delivery) and I put the box on the stairs as Angie was leaving. I stepped outside to tell her goodbye and when I returned to my house, Tara was eating peaches right out of the box! I told you they were hard to resist! Of course we washed all the peaches and we peeled them as we canned them so there are no doggy germs in this cobbler
This was an easy recipe!

OK, back to the recipe! Step one was melting a stick of butter in a 9 x 13 pan in the oven at 350 degrees. As I melted that, I mixed up the other ingredients. I poured the flour mixture into the pan then dumped in my canned peaches with the syrup. 
This recipe seemed too easy and the concoction in the pan seemed a little bit soupy. But I had 40 minutes to wait, and time did tell!

The house was filled with the mouth-watering scent of peaces as it was baking!

And the resulting cobbler was beautiful! Yes, smell was an indicator of the level of deliciousness of this hot, bubbly, mouthwatering concoction!!

A picture is worth a thousand words, but a fork full of peaches is even better!
The real test came at dinner when we tasted it! Don't you wish you could have been here for this?

Friday, July 24, 2015

S'MORES!

My favorite things include the people I love (especially my family members), popcorn, and s’mores - to name just a few things!  If I have an excuse to make something for friends and family, I am all over it! This time, my cousin Martin was coming through town and I got the privilege of bringing dessert (thank you Glenn and Estelle for hosting dinner)!  And, you KNOW how I always follow a recipe exactly – NOT! 

I found this recipe online and you can too!
http://cookiesandcups.com/smores-in-a-jar/
 I loved the photos posted there.


This is the recipe I followed - almost exactly.  I filled a dozen jars, used the large box of instant Jell-O pudding, two (2) 7-ounce containers of marshmallow fluff and I put a large marshmallow on top. Patty you were right, the mini marshmallows would have been better on top.  They would have melted thoroughly inside when toasted under the broiler. Joel thinks I should use CoolWhip instead of marshmallow fluff next time and there will be a next time! 

All the ingredients - before I asked Joel to bring home the second container of marshmallow fluff.

I placed all the filled jars in a 9x13 pan for easy transportation and so I could put them all under the broiler at one time. It only took a couple of minutes to toast the marshmallows and I watched them carefully. I have been known to burn things - like the cheese, right Dayna? When the marshmallows turned a lovely toasty color, I carefully removed them from the oven and then placed one square of a Hershey Chocolate Bar in each. (Since the jars were cold and I placed them under the broiler, I think it is important to point out that I used canning jars which are made to take the heat; not that anything but the marshmallows got warm.)

The marshmallow wasn't quite melted enough to insert the piece of Hershey Bar.
Mini marshmallows would have done the trick!

These are not made for shipping. Let me know when you are coming to visit and I’ll make some for you too! 


(If you are still reading at this point, and you are a member of the Grammar Police, please make any corrections and teach me the errors of my ways!)

Tuesday, December 16, 2014

You can bake these crescent rolls!

Does your mouth water at the smell of yeast and the sight of soft dough rising in the bowl? Maybe just the thought makes your mouth water?

This is the often requested recipe for my dinner rolls. Maybe you'll make some for your next family feast?


As you can see, this card has been out and used frequently. I use butter instead of margarine, and my KitchenAid mixer for the muscle part. I premix the yeast, one tablespoon of sugar, and 1/2 cup of warm water. Then begin blending the rest of the ingredients...butter, 1/2 cup sugar, eggs, salt, milk, the pre-mixed yeast and the first three cups of flour. My sweet sister lovingly reminded me that Mom always scalded and then cooled the milk to room temperature. Bringing the eggs and milk to room temperature will guarantee the success of your yeast!
Set the timer and let the mixer beat this up for three full minutes. Then mix in flour one cup at at time; mixing for a full minute after each cup is added. By the fifth cup, I switch to the dough hook. I always use 6 cups of flour. Letting the mixer do the kneading feels a bit like cheating from when I used to make this under my mom's eye, but oh so easy these days! 

At this point, you can cover the bowl and place it in the refrigerator to rise up.  This is so helpful, because you can mix this the night before or early in the day you want fresh rolls for dinner.  

Or you can continue the process by placing the bowl in a warm spot to double - at least an hour. 

After the dough has risen,  punch it down, divide the dough in half, and roll into a circle about 16" across. Cover with softened butter.
Cut into wedges. I use a pizza cutter and make 16 rolls from each half of the dough.
Place rolls on a baking sheet and let these rise about 30 minutes. 
Preheat your oven to 375. (Mom used to bake hers at 400, but I burn my rolls that way!) Bake for 10 to 12 minutes. Then coat with more butter when you take them from the oven.

Following Mom's recipe, I've never had a failure. The only way to ruin this would be to not have good yeast. That's why I always pre-mix the yeast, water and sugar first to make sure it's working. When you see it is bubbly, you know it's good yeast.

I've made these upon request lots of times, I can ship them too, for a price! Maybe you'll try this recipe? Let me know how it works for you!
Happy Thanksgiving!

Wednesday, November 12, 2014

CINNAMON CARAMEL APPLES

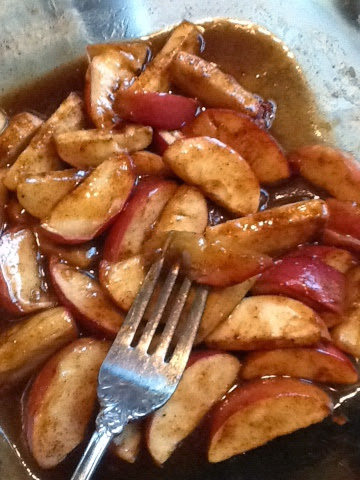
I had the pleasure of using my kitchen to taste test this recipe for baked apples. My house was filled with the mouth-watering smell of apples and cinnamon. It was so easy and delicious, I had to test this recipe again...and again! 
Bake apples  at 350 degrees for 20-45 minutes depending on the type and quantity of apples. 
The more apples you have packed in the dish, the longer it takes to bake.
This recipe is oh, so easy! The ingredients can be adjusted to feed a crowd of 50 or to make just enough for one or two to enjoy. 
Shiny, clean Gala apples.
Choose your favorite apple!

My superman used an apple corer slicer to make quick work!

Wash, core and slice 2 apples.
Toss the apples with the following mixture:
1 teaspoon cornstarch 
1/4 cup brown sugar
1/2 teaspoon cinnamon
1/4 teaspoon nutmeg 
Melt 2 tablespoons of butter in a baking dish. Add the coated apples and bake at 350 degrees for 20-30 minutes (or until the apples are tender). Stir to cover the apples with that yummy cinnamon caramel sauce that will be in the bottom of the pan and serve! 

We used one stick of butter in a 9 X 13 casserole dish and 10 apples.
Tossed apples in the brown sugar and cinnamon coating.
We used a gallon-size plastic bag to mix four apples at a time to make sure the apples were evenly coated.
Left over apples should be stored in the refrigerator. This makes a delicious side dish whether it is served hot or cold. But on a day like today, you'll want to serve this warm from the oven!


Friday, April 25, 2014

BANANA BREAD

Banana Bread
This smell fills the house and makes my mouth water! Don't you just love to smell fresh-baked anything? Guess who woke up and said, "Something smells good!" And the commercial says the best part of waking up is coffee. Really?

This is my tried and true, handed-down-from-my-mom recipe for banana bread. 
As you can see I've made a few notes over the years to make sure I get consistent results. 


The baking times vary depending on the size of loaf pans I use. 

I use the single loaf size if we aren't planning to share a loaf.


You may notice this inverted loaf is gently coated in sugar. Instead of greasing and flouring a loaf pan, try grease and then lightly sugar it instead. I do this when I bake cakes too. You'll note this came out of the pan smoothly.

These two are a nice size to use when I want to make one and then take a fresh-baked loaf to a neighbor (sorry I didn't do that this morning Dayna)!
These Pampered Chef loaf pans are what I use when making mini loaves for bake sales or special little gifts for the holidays.

Here's the easy part:

Preheat the oven to 350.
Measure carefully and stir together the dry ingredients in a mixing bowl.
In the blender put the eggs, ripe bananas, sugar, and lastly the butter.  
(I cut the butter into 4 chunks.  It seems to blend easier that way.)
Pour the banana mixture over the dry and mix them together.
Pour into the prepared pan or pans and bake!
My large loaf took 50 minutes today because the bananas were a bit large.  So always test your loaf with a toothpick to make sure it's thoroughly baked. The toothpick should come out clean when inserted in the middle.
Invert the loaf pan onto a cooling rack and let that melted sugar soak into the bread for about 5 minutes.

Slice and enjoy! 

I make this bread often and keep it on hand for JoPapa's breakfasts.  I haven't tried shipping this, but if you ask me nicely, I might be convinced to send or bring one to you...for the right price of course.
:-)
Or, you might try baking it yourself so your house will smell as yummy as mine!  Your family will love it too!


Saturday, April 5, 2014

FRUITY MUFFINS

These have to be healthy! They are filled with so much yummy goodness! Even though the original recipe says not to freeze them, I always do.  They are delicious once they are re-warmed.


The original recipe also calls for margarine, but I've switched to using butter. Have you noticed how weird margarine is these days? Recipes don't turn out the way I expect when I cook using margarine for some reason. Can you say "hydrogenated"? If you have read any of my posts you know I ALWAYS follow recipes exactly. Not! Tweaking a recipe is a sign of my creativity!


Let me know what you think of these sweet, healthy muffins when you make them! Or...for the right price, I can bake a dozen and send (or deliver) them to you! Enjoy!

Thursday, April 11, 2013

POTATO CASSEROLE


I am able to stand! I can be in the kitchen preparing dishes for my family and friends to enjoy! I get to do fun stuff and blog again! Lucky you! You get to read what’s going on in Peg’s Pantry!


This potato casserole is a favorite dish that is often requested for family gatherings.  We crave this cheesy potato casserole every holiday and of course this Easter was no exception.  I tasted this dish for the first time at a Dinner-for-Eight get together more than 20 years ago and it made a lasting impression. (Interesting side note, these hash browns used to come in a 32 oz bag. So depending on the crowd I'm expecting, I either use just 28 ounces or I buy two bags and add more potatoes.  Either way, I don't alter the rest of the recipe.) This is a wonderful side dish that can be prepared ahead of time and then baked when needed. It feeds a crowd and for that reason I don’t make it when it is just for Me and My Shadow.  

You'll notice that I substituted crushed Corn Chex for the cornflake topping.  That's due to poor planning on my part for not having the listed ingredients on hand, but it was very tasty and crunchy. I think I'll make it with Corn Chex next time too. We eat Corn Chex, especially when I make it in Puppy Chow, but that's another day's blog!


POTATO CASSEROLE

28 oz bag hash browns (potatoes O’Brian already have the onion included)
½ cup melted butter
1 can cream of chicken soup
12 oz. grated cheddar
8 oz sour cream
1 tsp salt
½ small onion diced (skip if using O’Brian style)

Topping – mix together
2 cups crushed corn flake crumbs
¼  cup melted butter

Place thawed potatoes in 9 x 13 baking dish. Mix other ingredients except topping and pour over potatoes. Cover with corn flake crumb topping.

Bake at 350 degrees for 45 minutes or until heated through


Maybe next fall, I will experiment by putting this casserole up in several smaller containers to freeze for the future so we can take out just what we need instead of freezing the leftovers. To make it in smaller portions, I won’t thaw the potatoes, instead I’ll pour the toppings over the frozen hash browns, seal each baking dish tightly and freeze.  I would then need to thaw it in the refrigerator before baking. I’ll let you know if I follow through on that project.  Or maybe you will try this recipe and let me know if it works to put it in smaller portions.

Wednesday, March 27, 2013

BLUEBERRY MUFFINS

I discovered the most delicious and simple way to make muffins! Sunday morning, I often bake something special for breakfast.  This week, I decided to experiment with my blueberry yogurt. I think I get a bit more protein and calcium in the end product by using yogurt instead of milk.

So here’s what I did:  I mixed two cups of Bisquick, one egg, and two 6 ounce containers of yogurt together, stirred in about a cup of frozen blueberries (no, I didn't wait for them to thaw), and made the best tasting, lovely textured muffins!  I am already missing my blueberry bushes.  Maybe we'll plant new ones here so I can have blueberries on hand next year too?


BLUEBERRY MUFFINS

2 cups Bisquick baking mix
2 6 oz. Containers of blueberry yogurt
1 egg
1 cup blueberries

Mix all ingredients together.  Spoon into paper-lined muffin tins. Bake at 400 for 20 minutes.  Serve hot with butter! 


These have tasted very good frozen and reheated too.

Last week, I mixed blueberry yogurt and Bisquick together and made drop biscuits. They were really tasty too! By adding the egg, the texture changes into muffins!

Let me know if you try either of these experiments too.  I imagine any flavor or even non-flavored yogurt would be good! 


Friday, March 15, 2013

WHY ME LORD?


I am so blessed! Why me Lord? I ask that all the time.  I have so much and am so grateful! Days like yesterday, give me pause to give thanks! We are settling into our new home, we have all we need, and the sun is shining! Thank you, Lord!

It was so much fun to enjoy cooking dinner with Dayna last night too! She can easily get here after work and we chatted the hours away! Then she took a plate of food for Travis’ dinner too! 

Yesterday, I saw a FB post about baking garlic biscuits in a ring and they looked like the perfect accompaniment for our baked chicken, potato casserole and green bean dinner (aren't you hungry now?)  The recipe I saw called for canned biscuits and a bundt cake pan, but since I didn't have access to either of those (I don’t keep canned biscuits around and the bundt cake pan is still in a box), we improvised!  I do keep Bisquick baking mix, and Dayna showed me how to use a round cake pan with an inverted bowl in the center for a make-do bundt-ish type pan.  The results were just great!  Next time, I think we'll also mix in a cup of grated cheddar cheese. I need the calcium!


Mixing ingredients


We used the Bisquick recipe for family-sized biscuits, rolled that into a log, and sliced eight biscuits. Then we melted 4 tablespoons of butter and mixed in 1 teaspoon of onion powder, and 1 teaspoon of chopped garlic. She used Pam to spray the baking dish, then dipped each biscuit, and placed them in the pan. 


Clever use of inverted bowl inside the pan to make a ring of biscuits!

 Then she scooped the rest of the garlic and butter over the top of the biscuits.  She put the pan in the oven to bake for 15 minutes and came out beautifully delicious! 


Golden and delicious!

See what I mean? Why me Lord? I get to enjoy dinner while watching the sunset in my new house with my sweet hubby and my dahling daughter, Dayna.  A perfect way to end the day. Thank you Lord!

Monday, December 31, 2012

Pinwheel Biscuits

Sunday morning breakfasts are usually more than just a quick bowl of cereal. These pinwheel biscuits are one of JoPapa's frequent requests.  I've gotten a bit lazy so I use Bisquick instead of making my biscuit dough from scratch. I usually only make a half batch because these are best fresh from the oven.  But I have been known to make extra pinwheels just so we can have a few to nibble on for snacks later in the day too. To make biscuits, follow the mixing directions on the box. Once the dough is kneaded and rolled out, spread some melted butter over the top.

A little butter makes everything better!

Then generously sprinkle cinnamon sugar all over.  I have a sweet tooth and I sprinkle a lot of sugar! There isn't a correct proportion here, you get to make them to taste.  I keep my cinnamon and sugar mixed and ready to go at all times too.  It's handy to have to sprinkle on toast too!

Covered with cinnamon sugar and the melted butter.
Then roll up the dough.  Slice into rolls and place on a cookie sheet to bake.  I use a spatula to carry the rolls to the cookie sheet so my cinnamon sugar won't fall out.  I forgot when I moved the fist one over, so I had some clean up to do!
Rolled up dough.
Here they are ready to bake in a preheated oven according to the directions on the Bisquick box.

Ready for the oven.
It took 10 minutes at 450 and they cooked up beautifully.  Using Bisquick feels like "cheating" but the biscuits are always fluffy and delicious!
Sunday breakfast!
Can't you smell them? These are quick and easy to make so I won't even tease you about mailing them your way.  If you want to come eat breakfast some time, or just have a chat with me, a cup of tea and some pinwheel biscuits let me know! I'd love to see you! Or, I bake lots of things by request so if you aren't hungry for biscuits, I'll cook up something else!

Here's looking forward to 2013. May you have healthy, blessed, HAPPY NEW YEAR!

Wednesday, August 1, 2012

QUICK YUMMY TREAT!

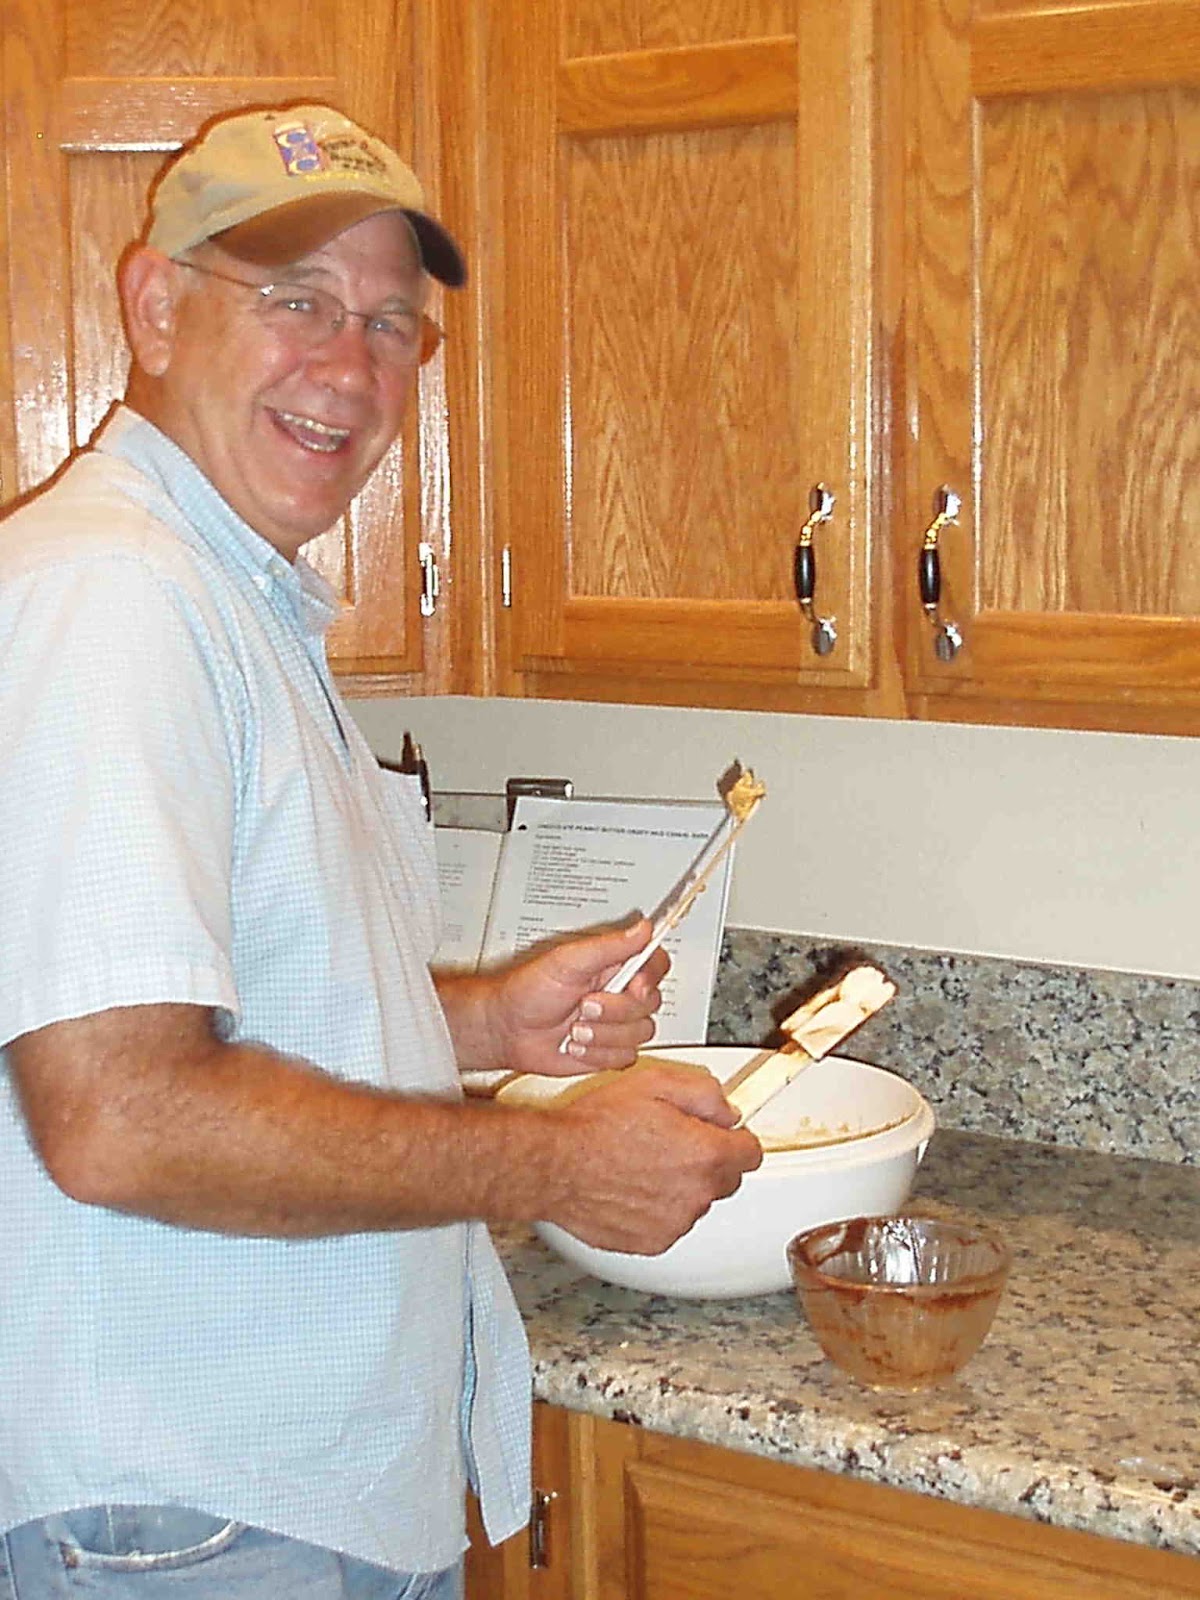
This won’t heat up the kitchen too much so this is a great treat to make in the summer time. Plus, it stirs up quick on the stove top so it doesn’t take long to make.  I made these for God's Gathering last week and they seemed to be a big hit. So I'm making them again!

First, I like to get all the ingredients in order, and I pre-measure everything so I can just mix it up step by step. Now that my memory seems to be playing tricks on me, I double check myself so I don’t skip any steps.  Surely that has nothing to do with my age? Don't you sometimes have a few little distractions in your life and forget what's next?


I like to grease and sugar (not flour) the pans I use when I make sweet treats so that’s what I did this time too. I actually sprayed the pan with Pam and then sprinkled just enough sugar to cover. I made a couple of adjustments to the original recipe that my Dahling Daughter Dayna shared with me, so here is my version:

CHOCOLATE PEANUT BUTTER CRISPY RICE CEREAL BARSIngredients:
1/2 cup light corn syrup
1/2 cup white sugar
1/2 cup butter
3/4 cup crunchy peanut butter
1 teaspoon vanilla
1 (10.5 ounce) package mini marshmallows
6 cups crispy rice cereal
TOPPING
2 cups semisweet chocolate chips
2 tablespoons Crisco
Directions:Pour the rice cereal and crunchy peanut butter in a large bowl; set aside.
In a heavy-bottomed saucepan combine the light corn syrup and white sugar; bring to a boil; continue to boil for 1 minute.
Reduce heat to low and stir in butter or margarine, peanut butter and vanilla until melted and smooth.
Add in mini marshmallows and stir until blended.

Pour the marshmallow mixture into the rice cereal and stir with a wooden spoon until well combined.
Press the mixture into a greased 9x13-inch baking pan, flatten with the back of a buttered spoon. (Sometimes I use a piece of wax paper that I lightly coat with butter to press down these Rice Krispy Treats.)
In a microwave-safe bowl microwave the chocolate chips with shortening on HIGH until melted, removing once to stir. This took less than one minute and I stirred it at 30 seconds. Immediately spread the hot chocolate mixture evenly over the bars; chill to harden the chocolate.

Then, c
ut into desired size bars.


It's easy to clean up especially if you have a Cookie Monster to pre-wash the spoons and bowls.

This is something from Peg's Pantry that I could easily ship to you (for a fee of course). If you don’t have time to mix these up yourself, let me know…make me an offer I can’t refuse…beg, plead, ask nicely even…and I’ll make the next batch of these for YOU!

Wednesday, January 11, 2012

How do you handle agitation?

We had so much fun at Youth Group on Sunday night talking about agitation and shaking jars of heavy cream. It took about 45 minutes of agitating to make butter. We had plenty of time to talk about things in life that agitate us and how we need to ask for the Lord’s help in dealing with those things. But if you think of it, bliss follows agitation like a rainbow follows rain. So for a bit of bliss…we ate fresh baked bread with butter, honey and/or jam. Also, as a result of making butter from cream, I was left with a bit more than 2 cups of buttermilk. I shouldn’t have been surprised that using real buttermilk versus the powdered version (I keep powdered on hand for this recipe) made for fluffier, tastier cookies. Nothing like the real thing for real goodness! Enjoy! I can make and ship these to you – for a fee of course. J
BUTTERMILK COOKIES
1 cup shortening 4 ½ cups flour
2 cups sugar 1 tsp. vanilla
2 eggs 2 tsp. baking powder
2 cups buttermilk with 1 tsp. soda mixed in
Beat shortening and sugar. Add eggs and vanilla. Beat well. Add other ingredients and mix well. Chill 1 hour. Drop on lightly greased or non-stick cookie sheet. Bake 12-15 minutes at 350ยบ. Cool and frost with powdered sugar icing.