Sunday, October 28, 2012

SIMPLY SWEET ROLLS!

If you feel daunted by baking, come to the Silver Tea and Bake Sale on November 10th at the Bolivar United Methodist Church.  We will feature these rolls as well as many other delicious treats like Cocoa Drops, fresh baked bread, crescent rolls, and a whole list of other items you may purchase and freeze so you can serve them up at your Thanksgiving feast!


Simply Sweet Rolls - fresh! Can you smell that cinnamon?


This recipe came from Bill and Vanessa. We made tons of these to sell when we were raising funds for the Youth Group Ski Trips – many years ago. They are as delicious as they are quick and easy to make. I always have the ingredients on hand so I can make and take these any time. Just recently, I baked some up to share with a grieving family; a small bit of comfort - fresh baked breakfast rolls.

Baking yeast rolls isn’t as difficult as some people make it out to be. First, gather your ingredients. Mix everything up – I use my Kitchen Aid Mixer. Let the dough rise. Roll out the dough and spread the butter, sugar, and cinnamon mixture. Roll it up into a log, the slice into rolls. I use a bit of cotton yarn or unflavored dental floss to easily cut the dough. Place the rolls in the pans. Let the dough rise again. Bake and then drizzle while they are still warm from the oven to make a nice glaze. I did learn the hard way that you can put too much sugar and frosting on a sweet roll. Who knew? Now you do!

SWEET ROLLSMakes 16 large 3 cups warm water
¼ cup sugar
1/3 cup oil
1 ½ tsp. salt
2 tbl. yeast
2 tbl. dry mil
3 cups flour
Mix well. Then add
4 cups flour – one at a time.
Let double.
Roll into rectangle. Spread with:
½ cup margarine (melted and cooled)
1 cup white sugar

2 tbl. Cinnamon
Roll into a log, slice, place rolls in pans, let rise, bake for 20 minutes at 375 degrees.
Ice with powdered sugar icing while still fresh from the oven.

Thursday, October 11, 2012

SMOKED TOMATO SALSA

Fall weather makes me want to warm up from the inside out! Makes me want to eat something spicy like my salsa! Or making soup or chili using some of my salsa instead of plain old tomatoes.


At the request of my kids, I tried a new twist with my salsa…actually I finally got on board with the fad of smoked and roasted vegetables! We sliced up our tomatoes and put them in the smoker. Wow! What a wonderful flavor that incorporated into the finished product.

Smoked tomatoes


Make sure you keep your smoker at the correct temperature.


Starting with the gardening process, a hobby I enjoy because I get to be OUTSIDE, we till, plant, water, weed, and anxiously wait for tomatoes, onions, and peppers to appear and ripen. Why does that seem to take sooooo long? When we finally get to harvest the produce, I set aside a couple of hours to cook and can.

Collecting my fee!
Homemade salsa is a labor of love…and I enjoy sharing my labors – for a fee of course! My fee varies depending on who is asking. ;-) I delivered my smoked salsa in person, to Portland, Oregon. That fee included several days of visiting, camping, one river float trip, and LOTS of hugs!

The first step of canning is to make sure everything is clean.  Sterilize the jars and lids you will be using. Place the jar lids and rings in boiling water just before you are ready to fill the jars.


Use a jar lifter to put the jars in boiling water and to put the filled jars back in to process.


SALSA
Thanks for this recipe goes to Joni my long, lost neighbor and friend!


4-5 onions
2 bell peppers
9-11 jalapeno peppers with seeds
¾ cup sugar
1 cup white vinegar
3 tablespoons salt
8 to 12-oz tomato paste (depending on your preference for thick salsa)
Approximately 22 medium tomatoes un-peeled
Chop in food processor until chunky.
I put all these ingredients in a 6-quart pan and put the tomatoes in last to fill the pan.
Bring to a boil and gently simmer 30-40 minutes stirring ocassionally.
Fill jars to within 1/2 inch. Clean the jar rims and place lids on just finger tight.
Process filled jars in boiling water bath for 20 minutes.


Stir up all the chopped ingredients and gently simmer for 30 to 40 minutes. Then fill the sterilized jars.

If you would like more detailed information on canning, the internet is full of helpful tips or you can invite me to your kitchen for lessons.


Salsa!


Tuesday, October 2, 2012

Me and My Shadow

Me and my shadow, (or should say I, my shadow and I) also known as JoPapa Bear, have driven and pedaled our way from "sea to shining sea" this year. It wasn’t a plan in January, but that's how it turned out!

This spring we had an opportunity to go to Florida. We dipped our toes in the Atlantic Ocean.
Windy Daytona Beach with Dave Esser and JoPapa.
We visited Cousin Dave, toured Daytona Beach and had a great time thanks to Dave's hospitality.  We met up with Susan Morales our "angelita" foreign exchange student (whom we hadn’t see in 12 years). She was in Orlando starting a honeymoon cruise. What a sweet hubby she married ! He took time from a honeymoon for a visit with us!

Susan has a happy reunion with PapaJoel. Thanks for taking time, Arturo!

We then rode our bikes into the sunset in the Keys, in the Everglades with alligators, and stopped at every beach along the coast of Florida.  We were surpised when we ran into our friend Shelby from Bolivar when we stopped to watch the dolphins.


Sunset melting into the water in Key West, Florida.


My Shadow on 7 Mile Bridge

It's a small world, Shelby! Who knows when you'll run into someone from home


He's just a little alligator coming up to say hello to me on my bike!
Of course we've spent time on the Ozark Greenways Trail.  One perfect day in August (excluding that little bike crash at the beginning) we rode to Springfield and back.  

Can you see me and My Shadow looking over the edge into the Sac River? No alligators, just fish, turtles and snakes.


In September, we drove to the Pacific coast for a visit with Joel Jr. and Mary in Oregon. We biked and ate our way around Portland. While we were there, we stayed at a lovely AirBNB hosted by Ada.  Next time we go to Portland, we'll be staying there again! The acommodations were great. Contact Ada at orangeada@gmail.com if you plan to visit Portland. 

We got to join The Joel and Mary's friends for a float trip on the Clackamas River. It was a perfectly warm day...to help keeps us warm from the cold river. Rapids, a rope swing, laughter!


While The Joel & Mary were being great wedding photographers on Saturday, we drove to Seattle. We had a lovely visit with Doug, Rita and nephew Mike. We went to a festival and toured the Mukilteo Lighthouse. Back at Doug's grill, we enjoyed a fabulous salmon dinner. 
And a free car wash! Thanks, Doug!!


Then we spent three days camping on the Oregon coast with Joel Jr and Mary. They cook some amazing meals over a campfire! I highly recommend their smoked nachos!


Me and My Shadow camping in Oregon. 

Me and My Shadow with Joel Jr and Mary at our campsite on the Oregon Coast.

Joel Jr - kite sailing on the beach. The kite is WAAAY up there!


Watching the sunset on the ocean off the Oregon coast.

After our fun camping adventure, we had to say goodbye to the kids.  We then drove to South Dakota where we rode 109 miles on the Mikelson Trail Trek.


Me and My Shadow at a rest stop on the Mikelson Trail Trek.

Me and My Shadow on the Mikelson Trail. No alligators here either, but we saw a large herd of buffalo!
The following weekend and closer to home, we fought the cold and wind (no I’m not whining, I’m bragging) as we pedaled to raise money for a cure for Multiple Sclorosis. We did the Bike MS ride from Olathe to Lawrence and back again. This was Joel's 29th year of riding to raise money for MS research.

See the frost on my glove? Me and my shadow are in the mirror.  I took the photo while freezing and pedaling but we didn't wreck this time!


We are blessed to have had the time and health to ride across this beautiful country. What a blast we’ve had! It's a great day for a bike ride and I’m always ready for more. Next weekend, we get to do the Dam Stockton Ride. We love to find new places to ride and enjoy. Thank you, God for my shadow who finds fun, sun and bicycle trails for us to ride!


Sunday, August 19, 2012

Bicycling!

Enjoy a few photos taken by "Me and My Shadow". You have to guess which one is JoPapa and which one is me. :-) But first a caution: "do not attempt to take photos while riding". If I were a professional Ninja Photographer like Blue Window Creative, http://lookbook.bluewindowcreative.com/category/blog/ I could snap a great shot without wrecking our bikes thus sentencing JoPapa to several weeks of healing from a broken collar bone! Notice how our handle bars are just touching...then we wrecked!!! Yikes!


When not in recovery, we love to get out in the cool of the day and ride together. We see so many things and enjoy being in nature.


We relish the fresh air, sunshine, smells of hay, birds calling, cows mooing and, the feel of the road or trail beneath our tires.


As we ride by, we have often surprised turkey, deer, coyote, fox, lizards, and snakes. We don't always manage to get a photo of the wildlife but it is always so fun to see that they are hiding along the way.  We hear the rustle of dry leaves as rabbits, squirrels and other small creatures scurry off to hide.

Me and My Shadow riding past the La Petite Gemme, the prairie on the Frisco Highline Trail.

A five-lined skink looking for a snack.

Now, if you are afraid of snakes, close your eyes for a second and scroll past these next couple of pictures. We don't always see snakes, but when we do, we'll stop and take a photo if we remember to bring along a camera.  Yesterday, we rode past a fat green snake.  It was bigger than this one and was in the center of the trail. Since JoPapa was right beside me and the snake was in the middle, it had no where to go but up. I was surprised to see the whole body spring up, not just it's head. Boing! We were past in a flash with no harm done to any of us.


A little green snake surprised to see us ride past.


This snake is tense! Look how bumpy it is. It is about 24" long.  He was just leaving.


Water snake under the Sac River Bridge.

Me and my shadow looking over the other side of the Sac River Bridge on the Frisco Highline Trail.

 
Me and My Shadow riding past a rock bluff along the road.
 

The sunrises welcome  us each day and the sunsets wish us goodnight.


I know God is at work making this world and it's all good!


I also enjoy reading about others’ biking adventures. Pondero came to Missouri from Texas to ride the Frisco Highline Trail. His blog and photos were wonderful! Here is a quote and then a comment from our Polk County Bike Club friend, Steve Butcher.
http://chris-pondero.blogspot.com/
Unlike my friends in other locales, I don't see many stone walls during my wanderings. It seemed good to stop a moment and ponder. The one who placed the first stone instructs us in the virtues of vision, patience, and hard work.
GravelDoc said... It's interesting to look at a rock wall and discover what, at first, seems to be a bunch of rocks randomly stacked together; only to discover the builder had to hand pick each stone and fit it in with the others to build a structure that would stand. Perhaps this is kind of a picture of what the Master Builder does. I like rock walls.


That's a glimpse of my kind of fun.  Want to get a bike and go for a ride with us now?

Wednesday, August 8, 2012

Pumpkin Cake

I was searching for something for dinner that was buried deep in my freezer when I stumbled across a package of my frozen pumpkin! Not what I was looking for, but a great idea spark for the cake I'm baking to share at God's Gathering. Last fall, I cooked our Halloween pumpkin. Please note, we hadn't carved that pumpkin, but drew the Jack-o-lantern's face on it so I could spin it around and leave it out through Thanksgiving. Don't you just love to decorate for the seasons? I sure do! Anyway, I peeled, and cooked that pumpkin then froze it in one-cup portions.  I do love to bake treats and hide that vegetable nutrition from carrots, zucchini, or pumpkin inside! So here's another tasty treat you can bake up yourself! Or stop by my house...I bake requests you know! I could ship this to you, but you would have frost it when it arrives. I'm not sure butter cream frosting would survive in a box! Let me know what you think of this spicy, nutty, cranberry, pumpkin cake.

PUMPKIN CAKE 
 
1 2/3 cups flour
1 ¼ cups sugar
1 ½ tsp baking powder
¾ tsp baking soda
¼ tsp salt
2 tsp cinnamon
½ tsp cloves
¼ tsp nutmeg
¼ tsp ground ginger
3 eggs slightly beaten
1 cup canned pumpkin
2/3 cup cooking oil
½ cup chopped nuts
½ cup dried cranberries

Preheat oven to 350 degrees. In a large bowl stir together flour, baking powder, cinnamon, baking soda, salt, and cloves. Beat eggs, pumpkin, sugar, and oil. Mix in dry ingredients and beat on medium speed for two minutes. Stir in nuts and cranberries. Spread batter evenly in an ungreased 9x13-baking pan.
Bake for 25-30 minutes or until a toothpick inserted near center comes out clean. Cool in pan on wire rack. Spread with cream cheese frosting or butter cream frosting.

Wednesday, August 1, 2012

QUICK YUMMY TREAT!

This won’t heat up the kitchen too much so this is a great treat to make in the summer time. Plus, it stirs up quick on the stove top so it doesn’t take long to make.  I made these for God's Gathering last week and they seemed to be a big hit. So I'm making them again!

First, I like to get all the ingredients in order, and I pre-measure everything so I can just mix it up step by step. Now that my memory seems to be playing tricks on me, I double check myself so I don’t skip any steps.  Surely that has nothing to do with my age? Don't you sometimes have a few little distractions in your life and forget what's next?


I like to grease and sugar (not flour) the pans I use when I make sweet treats so that’s what I did this time too. I actually sprayed the pan with Pam and then sprinkled just enough sugar to cover. I made a couple of adjustments to the original recipe that my Dahling Daughter Dayna shared with me, so here is my version:

CHOCOLATE PEANUT BUTTER CRISPY RICE CEREAL BARSIngredients:
1/2 cup light corn syrup
1/2 cup white sugar
1/2 cup butter
3/4 cup crunchy peanut butter
1 teaspoon vanilla
1 (10.5 ounce) package mini marshmallows
6 cups crispy rice cereal
TOPPING
2 cups semisweet chocolate chips
2 tablespoons Crisco
Directions:Pour the rice cereal and crunchy peanut butter in a large bowl; set aside.
In a heavy-bottomed saucepan combine the light corn syrup and white sugar; bring to a boil; continue to boil for 1 minute.
Reduce heat to low and stir in butter or margarine, peanut butter and vanilla until melted and smooth.
Add in mini marshmallows and stir until blended.

Pour the marshmallow mixture into the rice cereal and stir with a wooden spoon until well combined.
Press the mixture into a greased 9x13-inch baking pan, flatten with the back of a buttered spoon. (Sometimes I use a piece of wax paper that I lightly coat with butter to press down these Rice Krispy Treats.)
In a microwave-safe bowl microwave the chocolate chips with shortening on HIGH until melted, removing once to stir. This took less than one minute and I stirred it at 30 seconds. Immediately spread the hot chocolate mixture evenly over the bars; chill to harden the chocolate.

Then, c
ut into desired size bars.


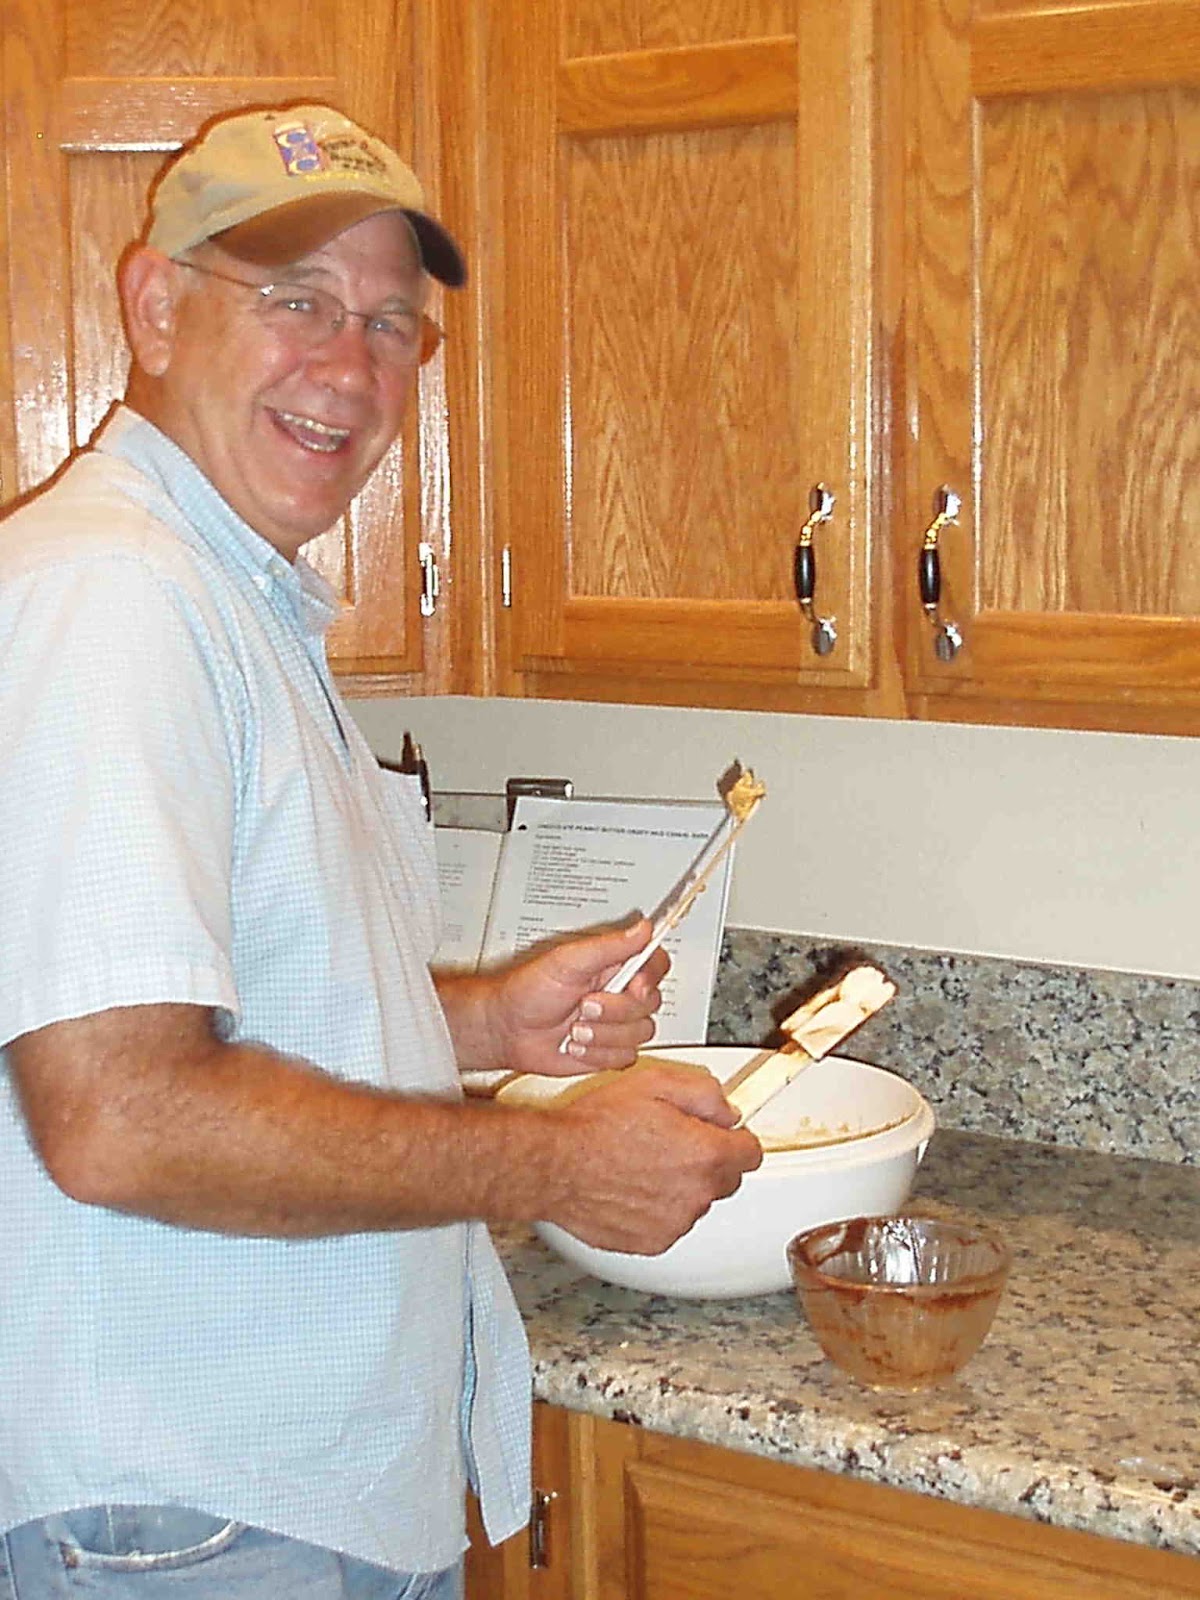
It's easy to clean up especially if you have a Cookie Monster to pre-wash the spoons and bowls.

This is something from Peg's Pantry that I could easily ship to you (for a fee of course). If you don’t have time to mix these up yourself, let me know…make me an offer I can’t refuse…beg, plead, ask nicely even…and I’ll make the next batch of these for YOU!

Tuesday, July 24, 2012

Layered Dip

This is such a simple appetizer to make and it is so delicious. It's a great snack! Don't you think it's healthy too? Black beans, avocados, my salsa...how can all that be anything but good for you? It can be made ahead of time and transported easily - which is just what I did! I brought it to share this weekend at our family reunion.  It travelled well with me in the ice chest. (I wasn't in the ice chest, just the casserole dish). I made a few alterations to the original recipe I was given so my recipe is what I'll share with you here. Call me when you make this and we can have a party because it makes more than just what a couple of people can eat! I'd post a picture, but we ate it all!
In a 9x 13 casserole dish layer the following:

1st layer - 15 oz can of black bean refried beans
2nd layer - Wholly Guacamole (comes in a two pack and I used both) (http://eatwholly.com/wholly-parade/?gclid=CM7K55H7srECFSZntgodpQEAyQ (click here to go to the website for a coupon!)
3rd layer - mix together 1 cup sour cream, 1/2 cup mayonnaise, and 1 package taco seasoning mix
4th layer - Large bunch of green onions, chopped
5th layer - 1 cup of Peg's Pantry Salsa
6th layer - 2 (2.25 oz) cans of sliced ripe olives
7th layer - 8 ounces shredded cheddar cheese

Serve with tortilla chips.